twitter
    Find out what I'm doing, Follow Me :)

Wednesday 6 August 2014

Painting Tips

Doing Renovations in the house I thought I should share some things that I have picked up over time and have helped me. These tips will save you time and money when you start your painting project. I believe in the saying "Buy Once, Buy It For Life". Buy something good, that will give you good results and that has a good life even though it is a bit expensive.

Buy Good Quality Paint
Why pay $40 a gallon when you can buy paint for $15 a gallon. It really does make a difference when you use good paint. You can get the same job done in half the amount of time because the better paint will require less coats and give a better finish. But i wouldn't go for the really high end paint though because you'll end up paying $15-$20 more per gallon but no matter how good the paint is or how the manufacturer claims it to be a one-coat paint, I've always ended up doing 2 coats.

Buy Good Quality Rollers and Paint Brush
Always buy good quality Roller and Paint Brush and wash it when you are finished with the Paint Job.
Hot Tip: Between drying times you can wrap your roller or brush in a plastic bag to make it air tight. This will stop the brush from going hard and you can easily reuse it after.
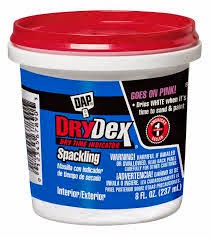
Wall Filler
I really like the Drydex stuff. It is pink when you put it on and goes white when it dries.


Hot Tip: Always apply a very thin layer of wall filler, Keep on Sanding in Filling until surface is flat. This way you don't have to sand too much and finished result is amazing.

Sanding Blocks
These come in really handy. Remember when sanding the smaller the number the sanding block comes in, coarser the sand paper and coarser the finish you will get. You only use coarser sanding block when you have a lot of sanding to do but always do your final sanding with a finishing sanding block to give a nice finish. 


Patching Walls
There are a few ways of patching holes in walls. If The Drywall is just cracked you can just apply a lot of mud (also known as drywall compound) until surface is flat. You can buy a big ready-made mud for around $20-$25.


You can also buy patches and stick them on then use drywall compound over it. Again Remember to apply thin layers, sand and then keep filling until surface is flat. If the patch is big use a finishing trowel to feather out the filled area with the surrounding walls where the hole is so the actual hole immerses into the wall around it and becomes completely unnoticeable.


Masking Tape
Buying good masking tape can also make a big difference. I normally get the blue masking tape now. Its worth it in the end though. If you have just painted a wall and you want to do accent wall or paint ceiling etc you might want to get Frog Tape. The thing is if you have recently painted a wall and put the blue tape on to separate walls so you can paint, when you start to remove the blue tape it takes off the paint on the freshly painted surface. The frog tape has special adhesive that doesn't do that.


Tuesday 5 August 2014

Renovating Master Bedroom Ensuite

Introduction

This is the en-suite bathroom in the Master Bedroom. It is not very big in size but initially it had 30" Vanity with a toilet next to it and a large mirror on the wall behind it. On the opposite end it had a single fiberglass shower and a shelf next to it with a wall dividing them in half. Behind this shelving was the chimney for the furnace. Last year we had our furnace replaced and they took out the chimney and vented through the side of the house instead. This gave us the capability to extend shower to a full 5' x 3' shower.

The Plan

Make a 5' x 3' tiled shower.

Have a niche in wall for storage

Have a bench to sit down

Have the lowest curb height

Have shower on both ends of the wall with independent controls

Tools and Accessories

Drill with Drill Bits, Utility Knife, Hand Saw, Mitre Saw, Table Saw, Circular Saw (with Fiber Cement Blade aswell), Reciprocating Saw, Multi-Tool, Hammer, Scraper, Measuring Tape, a few empty buckets, Sponges, 1/2" Trowel, Finishing Trowel, Epoxy Grout Applicator Sponge, Margin Trowel, Plumbing 1/2" Pex Rings Crimper, Pex Pipe Cutter, Copper Pipe Cutter, Portable burner, level of different sizes, T-Square, Square, Goggles, Mouth and Nose Guard, Crobar

Backerboard Screws, Standard Wood Screws, Floor Nails, Acoustic (black Stuff to put on Vapor Barrier), FibaTape Mesh Tape, Fiberglass Tape, PVC to ABS Transition Cement Glue, ABS Cement Glue, Soldering Flex, Solder, Teflon Tape, Masking Tape,

Materials

1/2" Hardie Backerboard, Thin-Set Mortar,

The Destruction and Removal of Old Stuff

We ripped out the shelves and the wall between the single shower and the shelves. Took out the Drain and faucet and we had to cut the shower in 4 pieces with a reciprocating saw in order to take it out of the bathroom door. We left the toilet and vanity there so it can still be used while we work on the shower. Also ripped out most of the floor tiles. This left us with studs all around the shower area ready for us to start working on shower.

Step 1: Plumbing for both shower heads


Good thing is the the shower is sitting directly above the furnace room so all of the hoses and drains coming into the shower are visible. First of all we had to add a shut off valves to the 2 1/2" pex pipes coming into the shower so that it can be independently shut off and we don't worry about shutting water of for the whole house while working in the one bathroom. The old pex pipes were coming through the sub floors instead of behind the walls so we had to cut them and make new holes and bring them through behind the walls instead. We put 1/2" threaded ends on the pex pipes so that the shower column can be attached to it, one for hot and one for cold water.

On the other side of the shower by the bench there is going to be a separate valve installed with a hand held shower. For that we had to plumb in a valve with a normal shower head on. You can see the shower head that we put on temporarily to test for leaks. We put water in the bucket that we poured down the new drain that we plumbed in to check for leaks in the drain.

Step 2: Redoing the Floor, Patching any holes and adding SubFloor


There was a square hole in the floor and the ceiling where the chimney was before we had the new furnace put in and the HVAC was vented through the side of the house instead. We patched the floor and put Thin-set mortar in the seams. For the ceiling we first put vapor barrier on the ceiling using some of the black acoustic stuff and stapled it on. Then we put screwed the drywall on it, and sealed the seems with mud. The house builders put popcorn type ceiling in the bathroom which are hoping to flatten by just applying a few coats of mud. Once the patching was done we put the 1/4" Sub-Floor.

Step 3: Plumbing in the Tile-Ready Shower Drain


Since the drain was accessible from underneath in the furnace room. We 
sawed out the 1 1/2" abs pipe and made out own model out of the Kohler drain that I purchased. The Shower drain was PVC and 2" in diameter where as our drain was ABS and 1 1/2" in diameter. Some standard plumbing and we just used a 2" to 1 1/2" adapter. For gluing ABS to PVC you can get a transition cement. We drilled holes precisely so that the drain sits tightly in the sub floor minimizing any gaps.

Step 4: Making the Niche


We cut the studs with a multi-tool and then put in some 2x4s across to make our own niche. This is a great idea for someone making their own shower/bath to avoid paying $$$ by buying those ready-made niches from the hardware store. We sloped the bottom of the niche by 1/8" by putting some shims in at the back, this will not allow water to stay inside the niche. The finished niche dimension will be 1' x 2' but we had to make them 1 1/8' longer on each side to allow room for 1/2" Backer Board, 1/4" layer of mortar (squished from 1/2") and 3/8" tile. Since these studs are only 2x4's we decided not to put backerboard on the back wall so that we can keep a good depth of the niche. We will just seal the edges and seams with Thin-Set Mortar and Waterproof the whole things with Redguard before putting Mosaic Tiles on the back of it.

Step 5: Making The Bench


We made a cage for the bench with 2x4s and them we covered it with 3/4" Plywood. The finished Dimensions of the bench are like this: WxDxH 24"x15"x18". We had to make the wood part 1 1/8" shorter on each side to allow for backerboard, mortar and tile. The bench was sloping by about 3/8" towards the drain so no water stays on it. We also figured out that the shower pan will be filled with mortar by roughly 2" at the bench so we made the bench 2" higher.

Step 6: Adding Extra Studs

We added some extra studs by the bench to allow for support when screwing on the backerboard. We also added extra studs underneath the niche to allow for a solid installation of the grab bar.

Step 7: Putting Vapor Barrier On

We covered the shower walls with vapor barrier before putting on backer boards. This adds an extra layer of protection. We just stapled it on and put Tuck Tape on the seems.

Step 8: Putting on Hardie Backerboards

We cut 1/2" Hardie Backer boards and put it all around the Shower Walls screwing them on with Hardie Backer Board Screws. We covered whole area including the bench except the back wall of the niche. We used a 7-1/4" Circular Saw with a Freud Fiber Cement blade to cut the Backer boards and a Diamond Whole saw to make holes in it. The Fiber Cement blade cost $30 but was worth it because it cuts through the 1/2" thick cement board like butter and gives a nice smooth edge.

Step 9: Sealing everything


There are a few steps involved in completely sealing and waterproofing the walls. This can take a couple of days.

1. We used mold-resistant Fibatape with Thinset mortar in all of the seams and screw holes.

2. Then We stuck on Fiberglass Tape with mud on.

3. Then we Put 2 coats of Red-Guard in all of the seams and screw holes.

Step 10: Making the Shower Pan


We cut out building paper and stuck it on the shower pain. We left 1 1/2" around the drain. Then we put a 3/4" plastic ring around the Shower Drain. The top of the ring is the height where we start measuring the slope. The slope is measured at 1/4" per foot to the borders of the shower pan. So at the bench the height of the shower pan will be 2". The furthest point of the shower pan from the drain would be the Wall next to the bench where the height of the Concrete will be around 2-3/8". We mark the height of concrete on the backer board around the drain. Then mix the concrete, fill the pan and make sure the shower pan is sloped evenly all around the drain.

Step 11: Waterproofing the Shower Pan

We put silicone on the edge between the backer board and the concrete shower pan base. Once dry we coat the whole base and edges and walls with RedGard. We apply 2 coats of it to ensure proper waterproofing insulation.

Step 12: Ready to Tile


Renovating Main Family's Bathroom

Complete Renovation of the Main Family Bathroom

Upgrading Vanity Countertop and Faucets
Repainting Vanity Cabinet
Changing Wall Mirror to Medicine Cabinet
Changing Light
Changing Toilet
Exchanging Old Bath Tub with Heated Jacuzzi Bath tubs
Re-tiling Wall and Floor
Tiling the Baseboard
Changing the Shower Rod to a curved one
Adding Spa/Massage Shower

Introduction

Working on writing up on how I went about renovating the Main Family Bathroom.